Air Conditioner Control Panel Not Working: Fix It Now
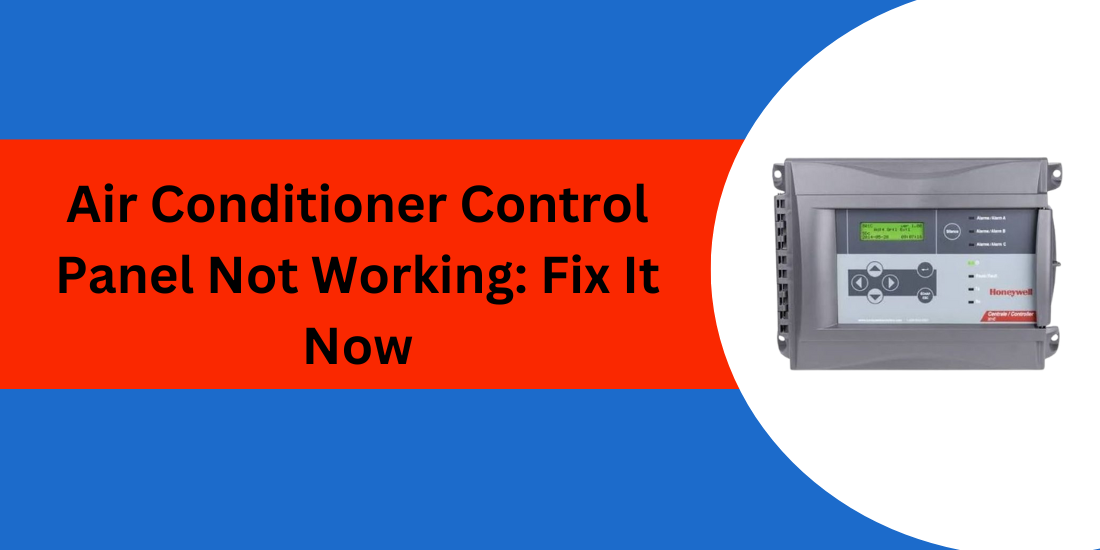
The control panel is a vital part of your HVAC system, allowing you to easily adjust temperature, fan speed, and operating modes. When it stops working, the system may become unresponsive or inefficient. Issues like a blank display, stuck buttons, or erratic behavior can quickly disrupt indoor comfort. This article covers the likely causes of a malfunctioning air conditioner control panel, how to troubleshoot and fix it, and when it’s time to call a professional.
Common Causes and How to Fix a Non-Working AC Control Panel
Here are the most common causes of a non-working HVAC control panel—and the steps you can take to fix them.
Power Supply Issues
One of the most frequent reasons an AC control panel stops responding is an interruption in its electrical power supply. Your control panel relies on consistent voltage to operate; even a brief power disruption can cause it to freeze or shut off completely.
How to Fix Power Supply Problems
Reset the Circuit Breaker: Locate your home’s electrical breaker panel and identify the breaker controlling your HVAC system. Flip it off and then back on to reset. Breakers can trip due to overloads or power surges, cutting off power to your AC.
Replace Blown Fuses: Inspect your HVAC unit or panel for blown fuses. Using a multimeter, test for continuity. Replace any damaged fuses with exact matches to avoid electrical hazards.
Check Wiring Connections: Turn off the power at the breaker before inspecting the wiring. Loose or corroded wires can interrupt power delivery to the control panel. Tighten terminals and replace any damaged wires.
Test Power Outlets (Window/Portable Units): If you have a window or portable AC, test the outlet with another device or a voltage tester. Switch to a different outlet if necessary.
Safety note: Always ensure power is off before opening panels or handling wiring. If unsure, consult an electrician or HVAC professional.
Thermostat and Remote Control Malfunctions
Often, the control panel communicates with or is integrated into a thermostat. Issues with thermostats or remote controls may appear as a faulty control panel.
How to Fix Thermostat and Remote Problems
Replace Batteries: Replace thermostat or remote control batteries regularly. Dead batteries are a common and easy fix for unresponsiveness.
Inspect Wiring: Remove the thermostat faceplate to check wiring connections. Tighten any loose wires and ensure none are corroded.
Reset or Reboot the Thermostat: Follow the manufacturer's instructions to reset or reboot the thermostat, often by removing batteries temporarily.
Update Firmware: For smart thermostats, check and install firmware updates via the app or the manufacturer’s website.
Re-pair Remote Controls: If using a remote control, follow instructions to re-pair with the HVAC system.
Check Network Connectivity: Wi-Fi-enabled thermostats require stable internet. Restart routers if needed.
Faulty Control Board (PCB)
The Printed Circuit Board (PCB) is the central processing unit of your HVAC system. It interprets inputs from the control panel and sends commands to various system components. PCB damage is a serious but common cause of control panel failure.
How to Fix PCB Issues
Visual Inspection: With power off, open the access panel and inspect the control board for burn marks, corrosion, or damaged components like capacitors.
Secure Connectors: Ensure all cables and connectors are firmly attached.
Test Voltage Outputs: If experienced, use a multimeter to verify that the board is sending power as specified by the service manual.
Replace the Control Board: Damaged PCBs must be replaced. Purchase an exact replacement from the manufacturer. Disconnect all cables, remove mounting screws, and install the new board carefully.
Note: PCB replacement involves electrical hazards and requires technical skills. Hiring an HVAC technician is highly recommended.
Physical Damage to the Control Panel Interface
Wear and tear can cause buttons, touchscreens, or displays to stop working correctly. Dirt, dust, moisture, or physical damage can affect the panel’s responsiveness.
How to Fix Interface Damage
Clean the Panel: Use a dry microfiber cloth to wipe dust and grime. Avoid harsh chemicals.
Inspect for Physical Damage: Check for cracks or severe wear. Damaged touchscreens or buttons usually need replacement.
Replace the Control Panel: Many units allow replacement of the interface panel without replacing the entire system. Order compatible parts and follow installation instructions carefully.
Calibrate Touchscreens: Some units require recalibration after panel replacement.
Software or Firmware Glitches in Smart Systems
Modern HVAC systems may have smart control panels that rely on software. Glitches or corrupted firmware can cause freezing, unresponsiveness, or erratic operation.
How to Fix Software Problems
Restart the System: Power off the HVAC unit for 3-5 minutes at the breaker and then turn it back on to clear temporary glitches.
Update Firmware: Check manufacturer websites or apps for updates and install them promptly.
Factory Reset: If problems persist, perform a factory reset via the control panel or app. This will erase all settings and require reprogramming.
Check Network Stability: For Wi-Fi-enabled systems, ensure your internet connection is strong and stable.
Sensor Failures and Communication Errors
Sensors feed the control panel with crucial data like temperature and humidity. If these sensors fail or lose connection, the control panel may malfunction.
How to Fix Sensor Issues
Clean Sensors: Dust and debris can clog temperature and humidity sensors. Gently clean them with compressed air or a soft brush.
Test Sensors: If you have a multimeter and service manual, measure sensor resistance or voltage output to verify proper function.
Replace Sensors: Order exact replacement sensors from the manufacturer. Power down the system, disconnect sensor wiring, and swap out the faulty unit.
Check Wiring: Inspect sensor wires for breaks or corrosion. Repair or replace damaged wiring as necessary.
Moisture or Condensation Damage
Excess moisture can cause corrosion and short circuits in the control panel area, especially if the condensate drainage is blocked.
How to Fix Moisture Damage
Inspect and Clear Drain Lines: Blocked condensate lines cause water to back up and damage electronics. Use a wet/dry vacuum or flush with vinegar to clear clogs.
Dry the Unit: If moisture is detected inside the control panel or PCB compartment, allow the area to air dry fully. Use a portable dehumidifier or fan to speed drying.
Prevent Future Moisture: Seal any gaps or cracks where moisture can enter the control area. Consider installing moisture barriers or relocating the unit if persistent humidity is an issue.
Replace Damaged Components: Corroded wiring, connectors, or boards affected by moisture will likely require professional replacement.
Tripped Safety Switches or Float Switch Activation
The float switch shuts down the system if water collects in the condensate pan to prevent flooding.
How to Fix Float Switch Issues
Check for Water in the Drain Pan: Excess water triggers the float switch to cut power. Remove standing water using a sponge or wet/dry vacuum.
Clear Condensate Drain: Clean the drain line with specialized HVAC drain cleaners or a vinegar solution to remove algae and debris blocking water flow.
Reset the Float Switch: Some float switches include a manual reset button—press it to restore power once the water issue is resolved.
Regular Drain Maintenance: To prevent recurring issues, schedule routine inspections and cleanings of your AC’s condensate system.
Loose or Damaged Wiring
Vibration, heat, and pests can damage wiring inside HVAC units, disrupting control panel function.
How to Fix Wiring Problems
Turn Off Power: Safety first! Always disconnect power before inspecting wiring.
Inspect All Internal Wiring: Check for any loose connectors, broken insulation, or frayed wires within the HVAC unit’s control box and panel.
Tighten Loose Connections: Using a screwdriver, gently tighten all terminal screws securing wires.
Repair or Replace Damaged Wiring: If wires are damaged or chewed by pests, cut out the affected section and splice in new wire with appropriate connectors or terminal crimps.
Secure Wiring Harnesses: Use cable ties or clamps to prevent wires from rubbing against sharp edges or moving parts.
A non-working air conditioner control panel is not just a small inconvenience—it can undermine your entire HVAC system's efficiency and performance. If you’re unsure about tackling the repair yourself, don’t hesitate to contact a licensed HVAC technician. With routine maintenance and smart upgrades, you can extend your system’s life and avoid future breakdowns.
Written by Allen Rode for PartsHnC, your trusted source for high-quality HVAC parts, including water heater components, air conditioner parts, and heat pump solutions.

Super helpful and clearly explained.
ReplyDelete